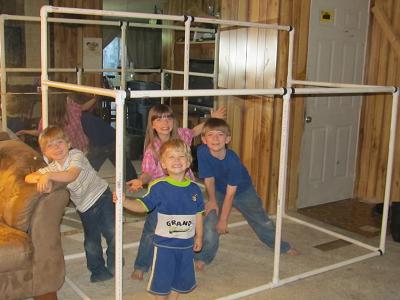
Puppet Stage
Guess what??
We forgot to take lots of pictures but we do have a long video.
We made a puppet stage frame and curtains.
Here is what you need:
7 – pvc pipes that are 1 inch in diameter and 10 feet long
Measuring tape
Miter Saw (or any saw you have available)
Safety Goggles
Ear Protection
6 – 3 way connectors (for 1 inch pipes)
2 – 90 degree corners (for 1 inch pipes)
6 – “T” connectors (for 1 inch pipes)
*********************************************************************
Make sure all the pipes and connectors are wiped clean.
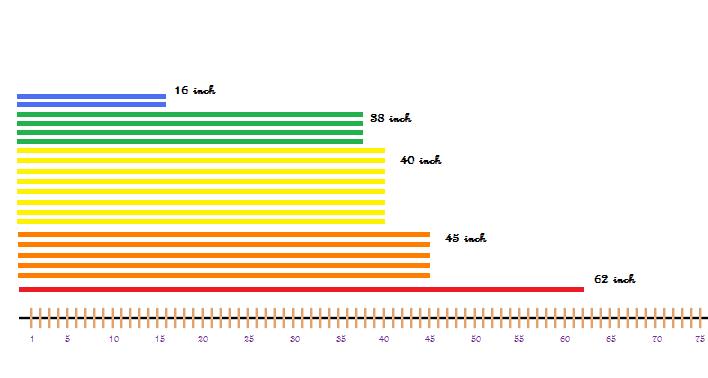
First ask your parents to help you cut the poles into the following sizes:
8 – 40 inch sections
4 – 38 inch sections
5 – 45 inch sections
2 – 16 inch sections
1 – 62 inch section
********************************************************************
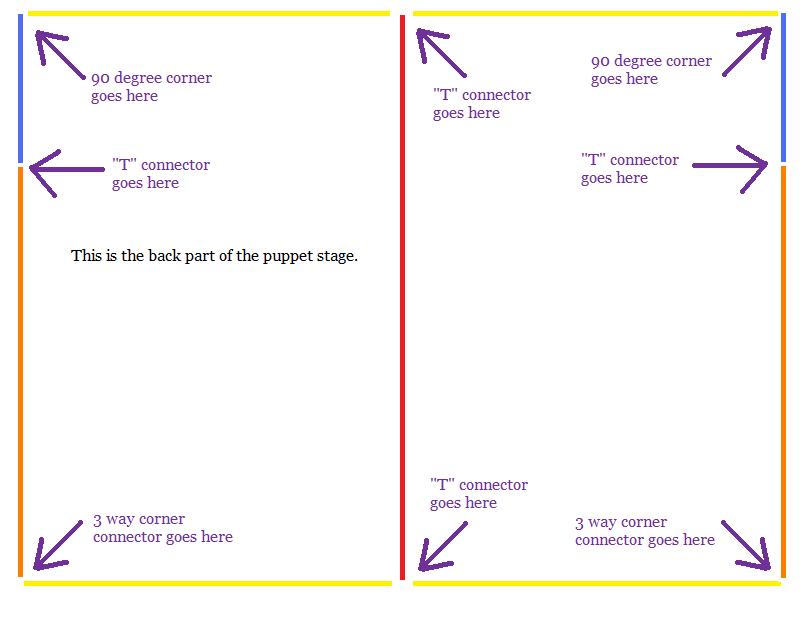
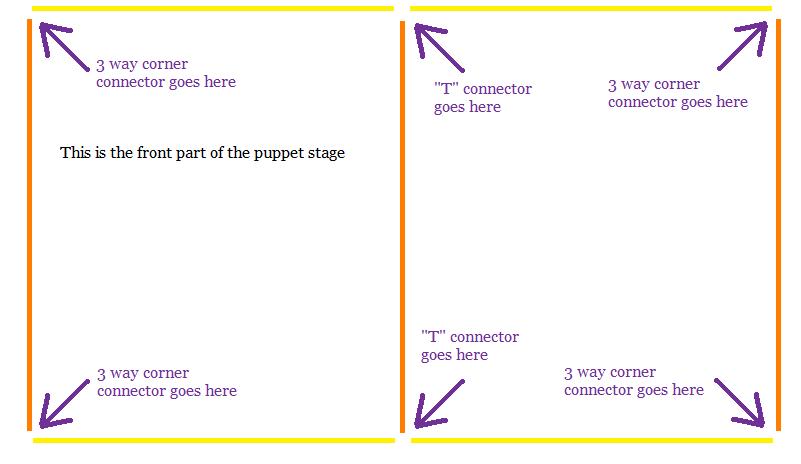
Next you will connect the following:
Here is the back of the puppet stage frame…
Here is the front part of the puppet stage frame…
Here are the poles we have left for the sides to connect the front and back together…
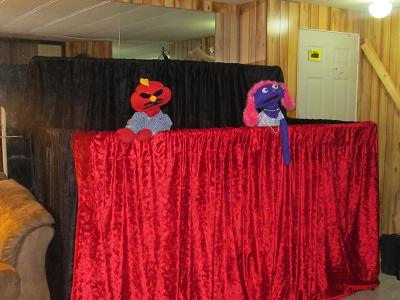
And.. here is the completed frame…
Since the pipes are just pushed together, our dad drilled holes in the connectors/pipes and put a nail in as a “pin”. We then taped over the nail, so it wouldn’t fall out. As you can see in the pictures, we have black tape at a lot of the connections.
Once the frame is put together you can make the curtains.
We used a fake crushed velvet style fabric to make our curtains.
If you use any kind of lighting in the back you may want to find a thicker fabric.
Our fabric is 12 ft. 3 in. wide by 50 in. high both for the front and back.
We cut a hole in the stitching for the center poles to go through
Our fabric for the sides are 72 in. wide by 50 in. high.
We left a little extra at each of the corners to wrap around and clip or pin together when in use.
We hope you enjoyed this puppet stage idea.
Thank You!!
Tyler and Mackenzie
